Online Sources
Online Sources
Yes, sources are an often discussed and often disputed subject. How should I document things? Should I use Notes for my documentation? Do I really want to save all those images of documents? Is there a better way?
I hesitate to suggest that what I am about to present is ‘The Best Way’ to do documentation, but I find it useful, particularly when I want to be able to view the actual online documents from which I draw my information.
As an example, I will use findagrave.com, because I typically look there for hints about other family members, location of the burial, confirmation of birth and death dates and places, etc. Since FindAGrave is an online source, I want to be able to link to it from my Ancestral Quest file. There are several steps which I take in preparation for using FAG as a source.
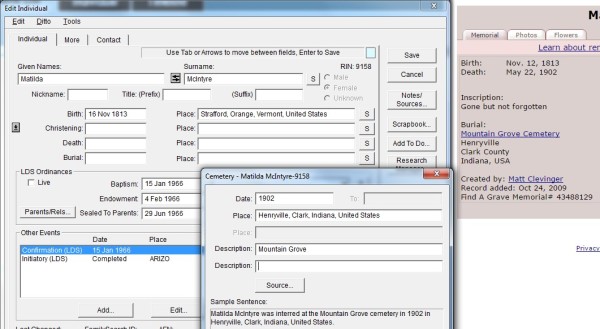
First, let me say that I listened closely to the instructions given by Gaylon Findlay in the Quick Start Video Tutorial. He gave some reasons why I should always record place names as City, County, State or Province, Country. (Go to the section titled ‘Quick Start – Entering a‘ and skip down to about 4 minutes and 30 seconds.) I like standardization. I like the concept of being ‘user friendly’ in my approach to genealogy. By that I mean that I try to remember that not everyone in this world speaks English, and they don’t all know that MI is the postal abbreviation for Michigan, not Minnesota, and that MS is the abbreviation for Mississippi, not Massachusetts. In other words. I try to remember to NEVER use abbreviations for place names. I also try to remember that even if the name of the cemetery is the same as the name of the city or county in which it is located, there is no place for a cemetery name in the four level structure of City, County, State or Province, Country. Therefore, I create an event which I call Cemetery. In this event I store the Date of burial. I also store the Place of the burial as City, County, State, Country. In the first Description field, I store the name of the cemetery. In the second, I store the plot number of the grave. I create the codes for the event sentence as follows:
%1%<T (%T)> was interred%4 at the %7 cemetery%<5 %@ %5>%<6 in %6>%<0, plot: %0>.
If you like the sentence this produces, feel free to copy this line of code, and use it in your own file. For information on building these sentence codes, link to Event Sentences.
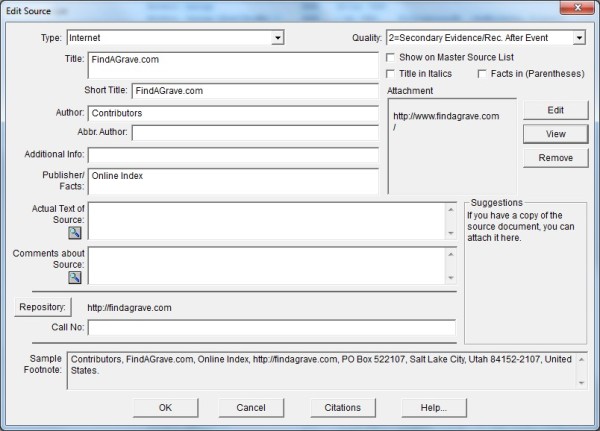
I create a source called FindAGrave.
I set the Quality to ‘2=Secondary Evidence/Rec. After Event,’ because few people do as I have done, and enter THEMSELVES into FindAGrave before they pass on. I guess I would have to leave it as a 2 anyway, because after my death, I will not be here to enter the death date myself. I will leave instructions telling my family how to do that.
In the Attachment window, I create a link to the FindAGrave webpage. (See the Attachment box on the Edit Source screen above)
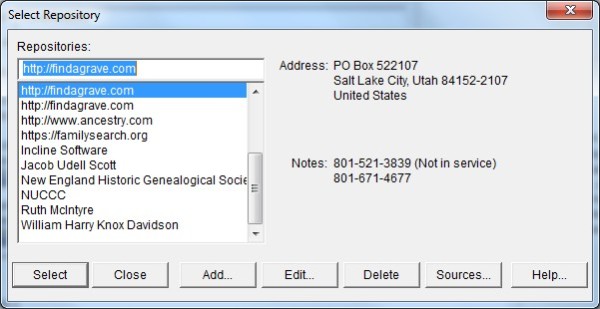
I also create a Repository record for my FindAGrave source.
Now that I have the event and source ready for use, I can attach them to deceased members of my file.
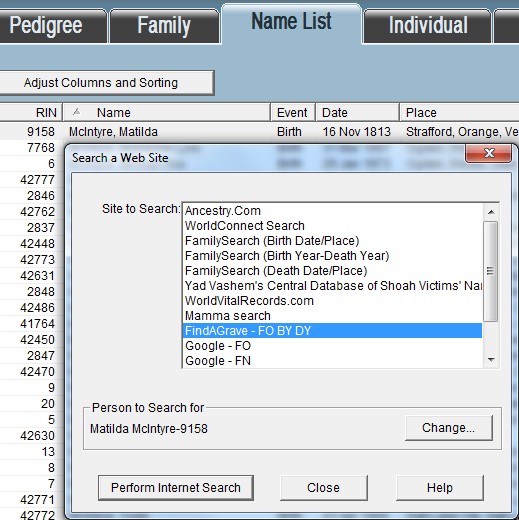
I look for a record of a deceased person who lacks FindAGrave documentation. For this, I highlight that person in the Name List view or the Family view, and click on Internet -> Search Favorite Sites, and select my home grown FindAGrave search…
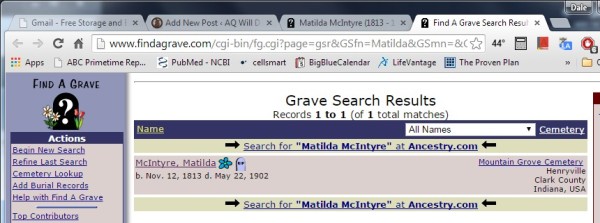
…passing along the first and last name of the deceased, the birth or christening date and the death or burial date. FindAGrave does the search for me, and returns…
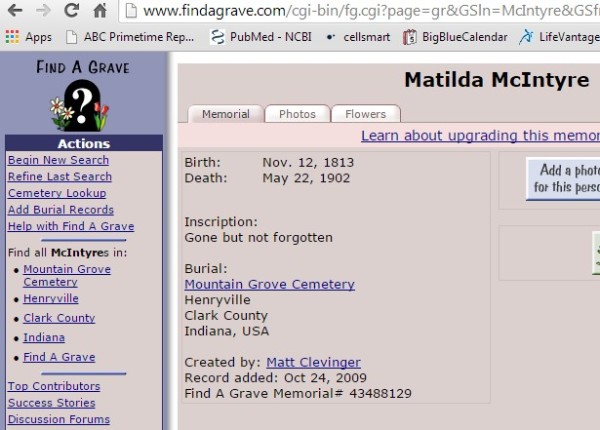
a pointer to the record of the deceased. I click on the name.
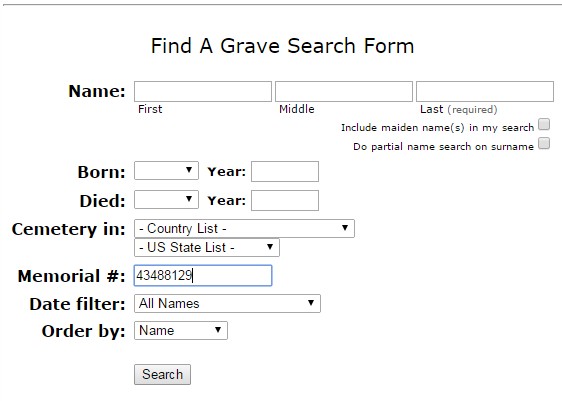
Notice the top line of the image above. That’s the URL. The problem is that it is more than just an address. It is a search key which causes FindAGrave to search for the record. Now look at the bottom line of the image. There is where you will find the Memorial number which is the Key to the FindAGrave record. I prefer to use the URL which goes directly to the record instead of searching all over again. I copy the Memorial number from the last line, and click on Begin New Search.
I paste the number into the Memorial #: field and click Search.
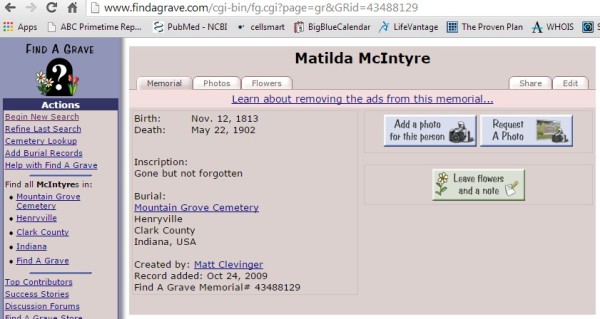
This returns the same record, but the URL listed at the top is a direct link to the FindAGrave record, and bypasses the search. In terms of computer time, it is much faster, and easier on the FindAGrave server. This is a service to others, since you won’t be able to tell the difference yourself.
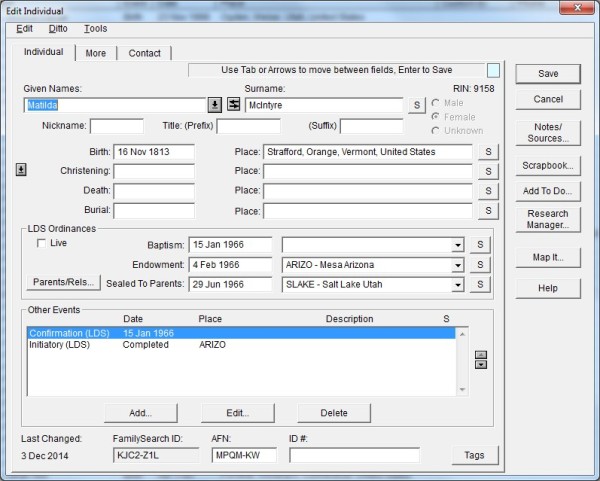
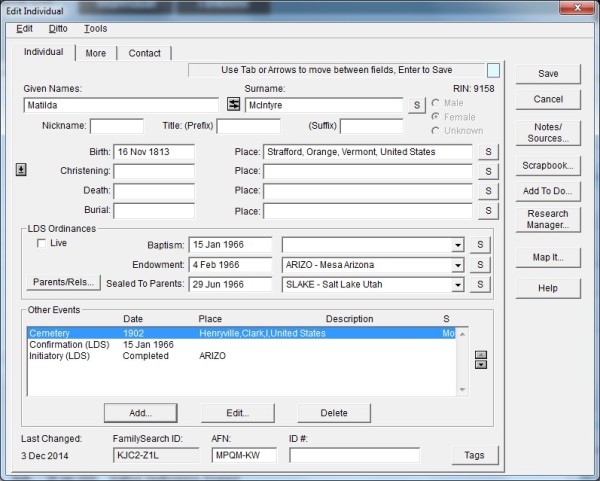
Now we get to the actual documentation. Bring up the Edit Individual record for this person.
Go to the Other Events for this person and click the Add button.
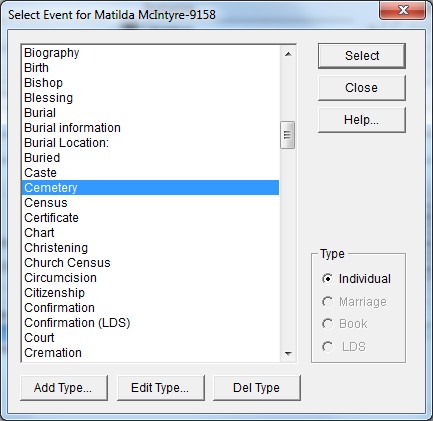
Scroll down to your Cemetery event and click on the Select button.
Fill in the Date of burial, Place of burial, 1st Description as the Cemetery name, and 2nd Description as the burial Plot if it is listed, or if you know it. If it has been entered into FindAGrave it can be found at the bottom of the Burial location. In this example there was no Plot information listed.
Next click on the Source button.
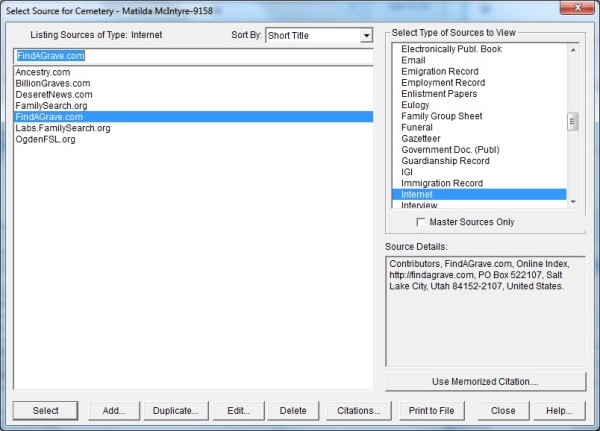
Highlight FindAGrave as the desired source, and click the Select button.
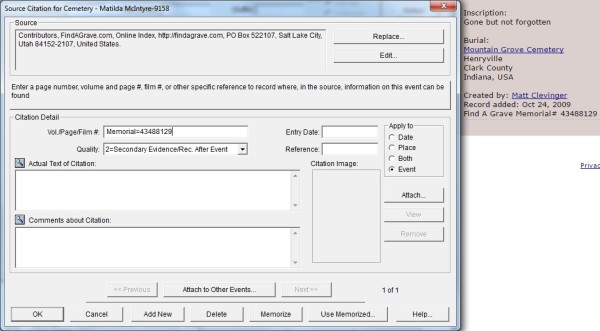
In the Vol/Page/Film # field, I place the notation “Memorial=‘ followed by the memorial number. I could have placed it in the Reference field, but the information from Vol/Page/Film # goes into the footnotes in the documentation of reports, and the Reference number does not.
Next I highlight the URL in the FindAGrave record, and Copy it to the clip board. Go back to the Citation screen, and click the Attach button.
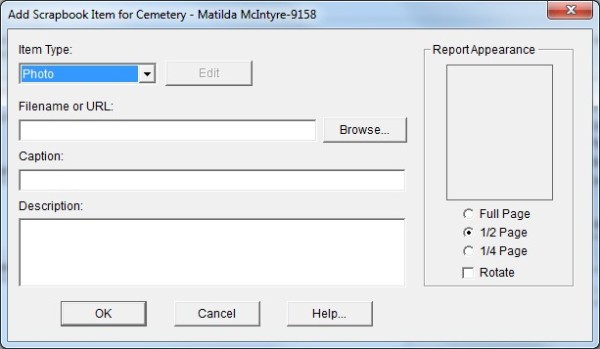
The Scrapbook screen shows the default Item Type as Photo. Click on the pull down arrow, and select Other…
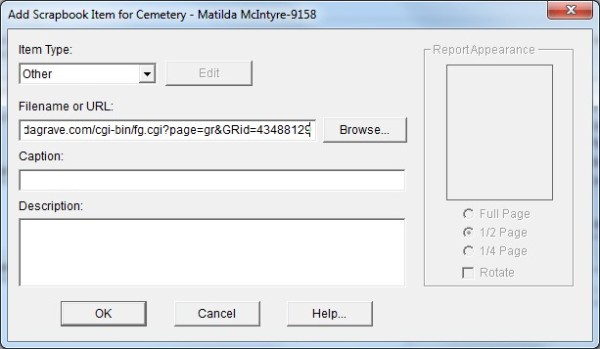
…then paste the URL into the Filename or URL field. Click on OK, OK, OK. That’s right, once on each of three screens as you navigate back out of this procedure.
Some day, Gaylon will find time to fix the calculations of the place name so that it truncates properly, and lets you see the name of the cemetery in the description field. Click on the Save button.
If you go back to the Edit Individual screen, highlight Cemetery in the Other Events box, and click on Edit, you will get the Cemetery event screen. If you then click on the Source button, you will see the Source Citation screen. Here you can click on the View button, over on the right side of the screen, and be linked directly to the FindAGrave record for your deceased person.
- Posted in: Event Sentences ♦ Events ♦ How to... ♦ Sources
- Tagged: Event, Event Sentence, Internet, Internet Search, Sources

Dale, I’ve only been using AQ for a few months now after switching from PAF which I used for years. Your Web page and associated info has been a great help for me. My ultimate objective in my research is to write a book (using AQ) to leave for my family when I pass on. I just downloaded and viewed the sample database that you pointed out that was on the Ancestral site and it opened up a bunch of fresh new ideas for me to use. Thank you for all of your efforts and ideas. I have many questions but for now, I’ll just let my “thank you” suffice while I continue to muddle through AQ and try to learn it better.