Research Manager

Wouldn’t it be nice if we could just push a button, and our research would all be done for us? We aren’t there yet, but we’re getting closer. One thing we need to think more about is where we can find the best evidence to back up the claims we make about the events in the lives of our ancestors, and even about their very existence.
Are you a planner with a short memory? Do you have magnets holding reminders to your refrigerator? Is there a white board in your home where you make notes about future events? Is there a planning calendar on your desk? Do you keep a notebook and pencil with you while you are doing research? Do you buy “Post-It” pads in bulk? The Research Manager may be just what you need.
The Research Manager manages your “TO-DO” list. We all have TO-DOs. Some of us use calendars to help us organize them. Some of us write various types of other reminders. Some of us just hope that we will remember.
In AQ, when you add to your TO-DO list, it stores them in a file. You manage this file in the Research Manager.
There are three ways to get to the Research Manager. The first is here, on the Tools tab at the top of the AQ screen:
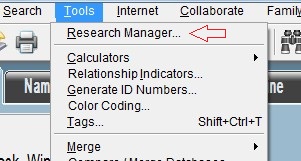
Click on Tools and select Research Manager.
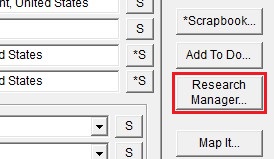
The second way is from within the Edit Individual screen, over on the right side:
The third way is from the Toolbar:

If you do not see a toolbar, click on the View tab, then click on Toolbar.
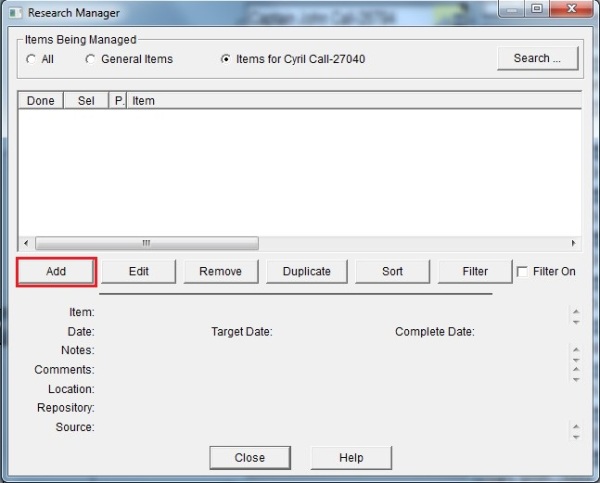
The Research Manager screen looks like this:
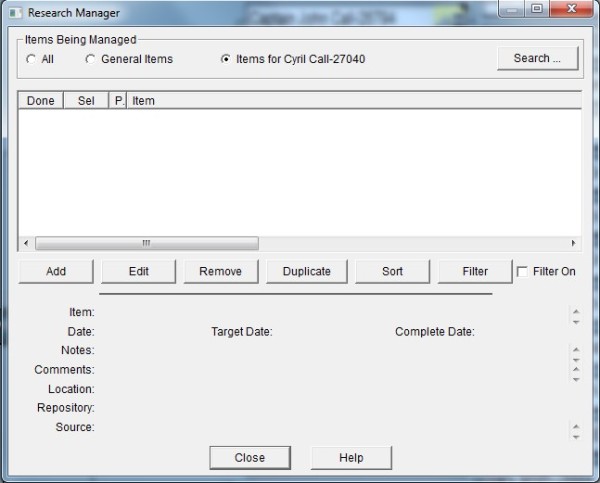
Note that the Research Manager screen is expandable horizontally and vertically, and can be expanded to full screen. On a large monitor it can easily show 30 research items without scrolling.
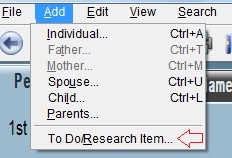
Before the Research Manager can be useful, there must be TO-DO items to manage. There are four ways to add TO-DO items. The first is from the Add tab at the top of the AQ screen:
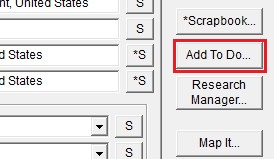
The second is from the right edge of the Edit Individual screen:
The third way is from the Toolbar:

The fourth is from inside the Research Manager screen:
All four methods will get you to the Edit To Do/Research Item screen:
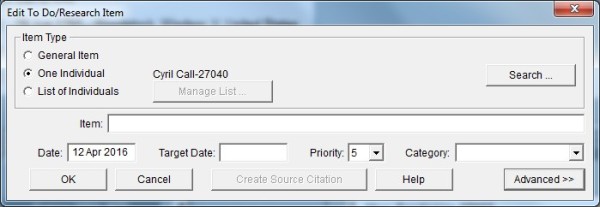
For this lesson, we will deal only with the One Individual option, selected in the Item Type box at the top of the screen. The General Item option creates general TO-DO items, which are not connected to any individuals. AQ always has one individual selected as the current individual. This person is selected when the program opens your file, and is changed whenever you select some other individual anywhere in the program. (Of course, this is not true if you have just created the file, and have not yet added the first individual.) If the current person is not the person for whom you wanted to make a to do item, press the Search button on the top right, and select another individual.
The first editable field is called Item and is the place where you state your basic goal, or what you want to research about this person.
The next line has two date fields. The first, the Date field, is filled with the current date, if this field is empty when you enter the screen. The next field is a Target Date. Are you a planner or a goal setter? Here is where you remind yourself about when you plan to have this item completed. The Target Date is an optional field.
The next field is the Priority. This is also optional. The default value is 5, but the pull down window contains a range from 1 to 10.
Next is a pull down list where you can place a Category. If you have never used it before, the list is blank. You choose what values to place on the list by typing a category name for the item you are now adding or editing. Be aware that once you enter a category name and save the item, the category will remain on the list, so choose category names carefully. I haven’t found a way to remove them.
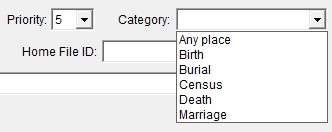
You may also leave the list blank. Category is optional.
The next line starts with a pair of fields. The first is a check-box labeled Completed. If you check the box, today’s date goes into the field labeled Completed Date. This date can be edited, if today is not the right date. This field is also optional.
The Home File ID field is for your personal use, and is also optional.
The Advanced>> button is used to show all of the fields below it on the advanced form of the screen. The <<Advanced button is used to hide those same fields. Here is the advanced form of this screen:
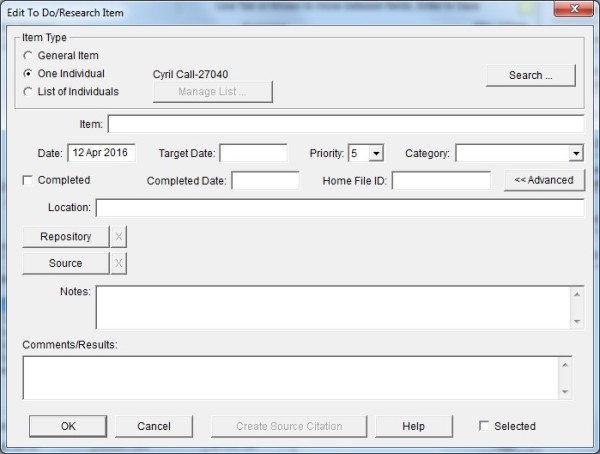
The first line in the advanced section of the screen is the Location field. It is used the same way as other place names in AQ, and shows a pull down button on the right when you enter the field.
The Repository and Source fields can be used to select repositories and sources from their respective files, and can also be used to add new entries to those files.
The Notes and Comments/Results fields are for your use, and are optional. If the item is linked to an individual, these notes do not appear in the notes of that individual.
The Selected check box is used to pick certain individuals from among all the individuals in your file, or from a list of individuals previously created by the Filter/Focus. This is useful mainly when the radio button at the top of the screen is not selecting One Individual. Selected is optional.
Here is an example of how the Research Manager is used when an individual is selected, rather than General Items or All items. There were reports that Cyril Call was in the 1850 US Census twice, once in Iowa and again in Utah. Here is the Research Manager screen showing two research items. Note that both of the research items are for Cyril.
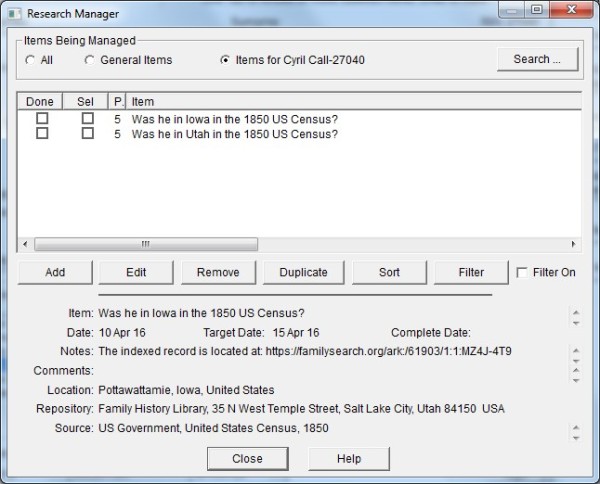
Each of the two items asks about his location during the 1950 census. The information on the lower half of the screen shows that the second item, about Iowa, was the last one highlighted. If we were to click the Edit button, the second item is the item which would be edited. The Add button would allow us to add another research item to Cyril. The Duplicate button would create another item identical to the currently selected, second item. We would then alter it to show what else we want to find out about Cyril. Sort will be discussed in the next lesson about Research Manager. The Filter button is similar to Field Filtering in the Advanced Filter/Focus for individuals. We will click the Filter button.
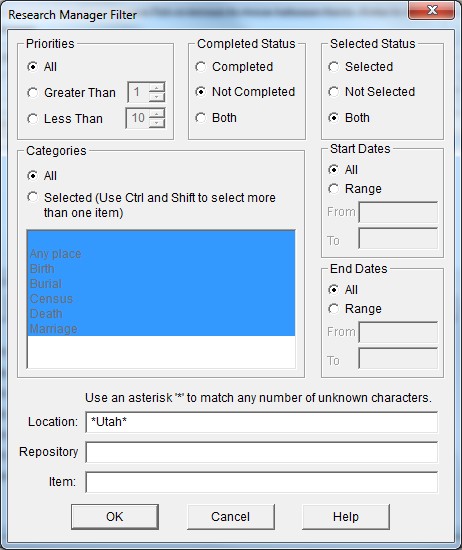
This filter is used to exclude research items based upon the values found in selected fields. There are nine fields in the research item which can be filtered. The first is Priorities. The default is to select All priorities. By clicking one of the other two radio buttons, you can accept only priorities Greater Than or Less Than a value of your choice. There is not yet an ability to select a range from inside the two extremes.
The Completed Status box allows you to accept only Completed or Not Completed items, or Both. The default is to accept only Not Completed items.
The Selected Status box allows you to accept only Selected or Not Selected items, or Both. The default is to accept Both.
The Categories box allows you to select All categories (including the blank category), or to select specific categories. Multiple categories are selected using the Shift and Control keys in the same way you would select files for a copy or move.
The Start Dates and Stop Dates boxes allow you to accept All dates or only a Range of dates of either type.
The Location field allows you to select a specific place or a place matching some part of a place name. In this example only place names including Utah are accepted. The asterisks indicate that any number of characters before or after Utah in the Location field will also be accepted. Here is the result of turning this Filter on.
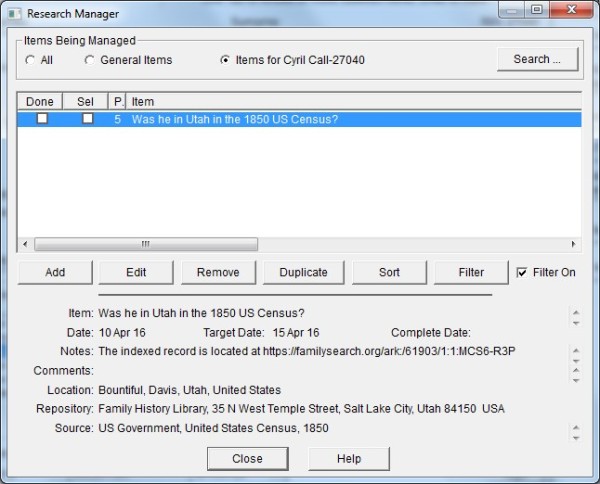
Since the second item did not contain the word Utah in the Location field, it was excluded from view. Using these filters you can select exactly the records you want to examine.
Research Manager goes wherever you take your Ancestral Quest file. No more of those lost Post-Its. No more pencil and paper. No more refrigerator.
Note that Research Log is a tab under Reports and Charts…
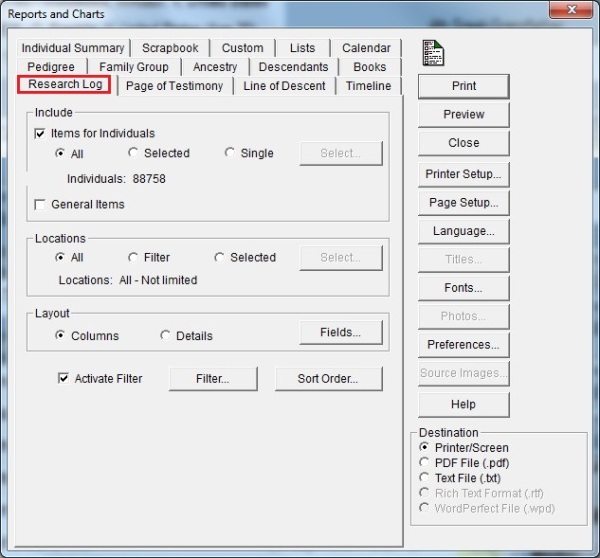
…but that’s a subject for another lesson. Keep researching, and keep your research notes where they were meant to be, right in your AQ file.

Suggestions/Questions about AQ Will Do or Subjects discussed here? Leave a Comment Below. I would like to hear from you!
- Posted in: How to...


I’ve been using the Research Manager since the beginning of the year. You might be able to answer a question I have about the asterisk on the Research Manager button. I can’t figure out why it is there for some individuals and not for others. I’ve started adding a red tag to the persons I have To Do Items for in the Research Manager so that I know at a glance that there is something which needs to be done. Thank you.
Cathy, I’m glad you asked. I should have made that clear. The Research Manager button on the Edit Individual screen acts much like the S buttons indicating that there is a source associated with that particular event or fact. It is like the Scrapbook button. It indicates that if you click on the Scrapbook button, you will find at least one scrapbook item for that person. For the Research Manager button, it indicates that if you push the Research Manager button for this person, you will find at least one To Do item for that particular individual. Remember, there are two types of To Do items. The general To Do item will not cause the asterisk to show. Adding a To Do item to an individual will cause the asterisk to appear.
Before I read this post, I didn’t realize there are so many different ways to pull up the Research Manager. I think I need to take the question to the Yahoo group for AQ. I have been adding To Do items by opening the Research Manager with the button on the individual’s screen. I haven’t done general items. Some individuals have the asterisk, others don’t. Since I have been doing everything the same I cannot figure out why some individuals have the asterisk and others don’t. Thank you Dale.
Well written and easy to understand and follow along with. Thank you.
Thank you Mary. Let me know if there are any particular subjects that interest you.
The topic on the Research Manager is well written and easy to understand. Thank you,
This is extremely helpful, please continue to help me more.
Nancy, please let me know if there are other specific subjects you would like to learn about.